
How to Navigate New Construction Roofing for Insurance Claims in Canada

New construction roofing insurance claims require complete documentation of materials, installation, and any damage from day one, followed by immediate notification to your insurer when issues arise, typically within 30 to 60 days of discovery. The process differs significantly from standard roof repair claims because coverage hinges on whether damage occurred during construction, resulted from defective materials, or was caused by post-completion events like severe weather.
Homeowners and builders often assume new roofs are automatically protected, but most insurance policies exclude damage from faulty workmanship or pre-existing defects discovered after closing. Understanding what your policy covers and when it applies prevents costly surprises. Builder’s risk insurance may cover damage during construction, while homeowner’s insurance typically takes over only after project completion and excludes installation errors. This gap in coverage makes thorough documentation and proper contractor vetting critical from the first shingle placed.
The key to a successful claim lies in establishing a clear timeline: when the roof was installed, when damage first appeared, and what caused it. Insurers distinguish between covered perils like hail or wind damage and excluded issues such as improper flashing installation or substandard materials. Canadian Roofs & Co. has guided hundreds of property owners through this complex landscape, combining construction expertise with deep knowledge of insurance requirements to ensure claims are properly documented and filed.
This guide walks through the complete process, from pre-construction documentation that strengthens future claims to the specific steps for filing when damage occurs. Whether dealing with storm damage on a newly completed roof or discovering defects shortly after construction, the right approach protects your investment and maximizes coverage.
Understanding New Construction Roofing Insurance Coverage
Builder’s Risk Insurance vs. Homeowner’s Insurance
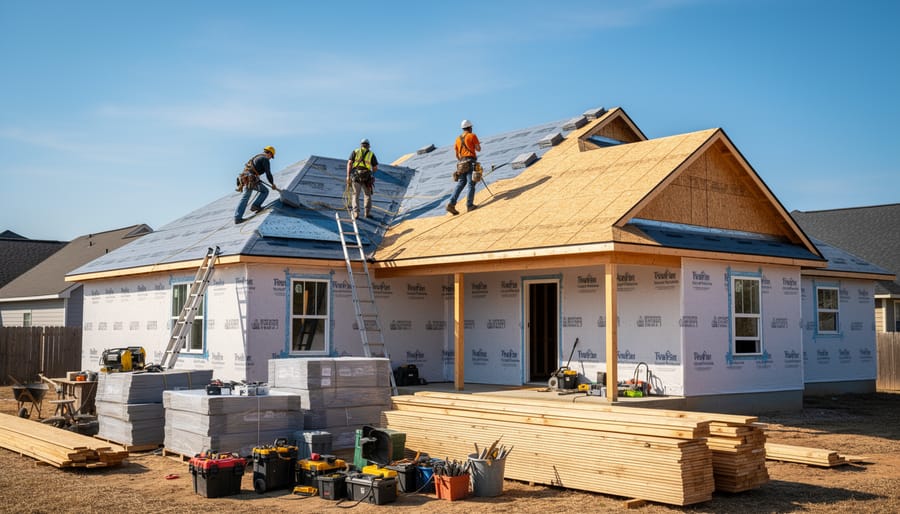
Builder’s risk insurance protects a new construction project while work is underway, typically from groundbreaking until the building becomes occupied or the builder transfers ownership. This policy covers the structure under construction, materials stored on-site, and temporary facilities. For roofing specifically, builder’s risk kicks in when storm damage, fire, vandalism, or theft affects materials before or during installation. The builder usually purchases this coverage, and it expires once construction wraps up or when you take possession, whichever comes first.
Homeowner’s insurance takes over after you move in or close on the property. Unlike builder’s risk, it doesn’t cover construction defects or workmanship issues that surface later. If your new roof develops leaks six months after moving in because of improper flashing installation, homeowner’s insurance won’t pay for the repair since it’s a construction defect, not a covered peril like wind or hail damage. However, if a severe windstorm tears off shingles from your recently completed roof, homeowner’s insurance would cover the damage.
The gap between these two policies creates a critical vulnerability period. You need written confirmation from your builder showing when builder’s risk coverage ends, then ensure your homeowner’s policy starts immediately afterward. Some builders maintain extended builder’s risk for 30 to 60 days post-completion, giving you breathing room. Verify both policies’ exact effective dates and understand that warranty coverage from your roofing contractor addresses defects, not the sudden damage that insurance policies cover.
Common Coverage Scenarios for New Roofs
Storm damage during the construction phase is one of the most common covered scenarios for new construction roofing. If severe weather strikes while your roof is being installed, particularly during vulnerable stages when sheathing is exposed or shingles are only partially applied, builder’s risk insurance typically covers resulting damage. The key is that the damage occurs before the project is complete and before occupancy.
Material defects represent another significant coverage scenario, though the responsible party varies depending on when the defect surfaces. If roofing materials fail due to manufacturing defects during or shortly after installation, the manufacturer’s warranty usually applies first. However, if the defect causes consequential damage, such as water intrusion that damages insulation or framing, your builder’s risk or homeowner’s insurance may cover the resulting harm while you pursue the defective product claim separately.
Installation errors fall into a gray area that depends on your specific policy language and provincial regulations. Generally, faulty workmanship itself isn’t covered by insurance, but damage caused by installation errors often is. For example, if improper flashing installation leads to water infiltration and structural damage, the resulting harm may be covered even though fixing the contractor’s mistake isn’t.
Common covered scenarios include:
– Wind damage that displaces or removes roofing materials during the construction period
– Hail damage sustained before the building is occupied or the project is finalized
– Manufacturing defects in shingles, underlayment, or other materials that cause premature failure
– Water damage resulting from contractor negligence, such as leaving the roof exposed overnight before forecasted rain
– Fire damage during construction from welding, electrical work, or other on-site activities
– Vandalism or theft of roofing materials before installation is complete
Understanding causation is critical. Insurance adjusters will investigate whether damage stems from a covered peril or from poor workmanship, which shifts responsibility to the contractor rather than the insurer.
Essential Tools and Materials for Documentation
Proper documentation is the foundation of a successful insurance claim for new construction roofing. Whether damage occurs during construction or shortly after completion, having the right tools and organized materials can make the difference between a smooth claim process and a lengthy dispute with your insurer.
At minimum, you’ll need basic documentation equipment that most homeowners already have access to. A smartphone or digital camera is essential for capturing high-quality images and video of any damage, the overall roof condition, and specific problem areas. Take photos from multiple angles and distances, ensuring you capture both wide shots showing context and close-ups revealing details. A measuring tape helps you record the dimensions of damaged areas, which adjusters need to calculate repair costs accurately. Keep a dedicated notebook or digital file where you record dates, observations, weather conditions, and conversations with contractors or insurance representatives.
Beyond these basic tools, gather and organize all construction-related documentation:
- Camera or smartphone with high-resolution photo and video capability
- Measuring tape (at least 25 feet) for documenting damage dimensions
- Notebook or digital file for recording dates, observations, and communications
- Local weather reports from the dates when damage occurred
- Material receipts showing roofing products purchased and their specifications
- Inspection reports from municipal or private inspectors during construction
- Contractor agreements outlining scope of work and completion timelines
- Manufacturer warranties for roofing materials and components
Don’t overlook weather documentation. Insurance claims often hinge on proving when damage occurred, so download or screenshot official weather reports from Environment Canada or local meteorological services showing wind speeds, hail, or severe conditions on relevant dates. These third-party records carry more weight than personal recollection.
Keep everything in both physical and digital formats when possible. Scan paper documents, back up photos to cloud storage, and maintain a chronological file that tells the complete story of your new roof from construction through any damage events.
Safety Considerations During the Claims Process
While you need to document damage for your insurance claim, your safety comes first, and accessing a new construction roof carries serious risks. Understanding when and how to document safely versus when to step back can prevent injuries and strengthen your claim.
Never climb onto a new construction roof yourself, especially if you suspect damage. New roofs may have hidden structural weaknesses, incomplete fastening, or compromised decking that isn’t visible from the ground. Storm damage, material defects, or installation errors can create unstable areas that may give way under your weight. Additionally, insurance companies and builders often require professional documentation for claims validity, so amateur roof access can actually hurt your case.
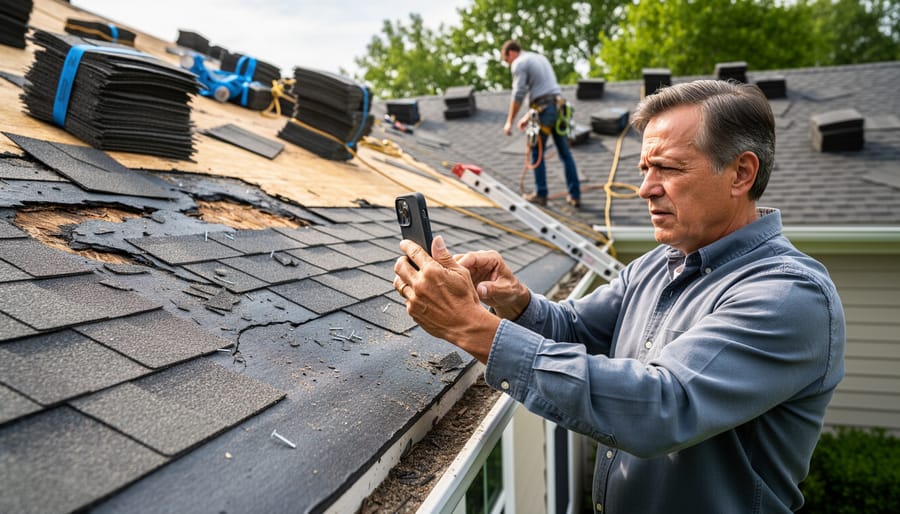
Instead, document damage safely from ground level using a smartphone camera with zoom capability or binoculars. Photograph visible damage to shingles, flashing, or structural elements from multiple angles. If you can safely access upper-floor windows or a neighbor’s property (with permission), capture additional perspectives without climbing. Note the date, time, and weather conditions in your documentation.
For any roof access, hire licensed roofing professionals or insurance adjusters who carry proper safety equipment, harnesses, fall protection systems, and appropriate footwear. These experts know how to identify safe access points and can spot hazards you might miss. Their professional reports carry more weight with insurers than homeowner observations.
Secure the property perimeter if debris has fallen. Keep children and pets away from the construction site, especially after storm damage. If water is entering the structure, place containers to catch leaks and protect belongings, but don’t attempt tarping or temporary repairs on the roof itself, leave that to professionals who can do it safely while preserving evidence for your claim.
Step-by-Step Process for Filing a New Construction Roofing Claim
Step 1: Immediate Documentation and Notification
The moment you discover damage to your new construction roof, whether from a storm, fallen debris, or suspected defect, stop and document before touching anything. Use your smartphone to photograph the damage from multiple angles, capturing wide shots that show the roof’s context and close-ups of specific issues. Include timestamps if possible, and take video that shows the extent and pattern of damage.
Call your builder first if construction is still underway, as builder’s risk insurance typically covers active projects. Document this notification in writing via email or text, noting the date and time. Then contact your insurance company within 24 hours, even if you’re unsure whether the damage warrants a claim. Most policies require prompt notification, and delays can jeopardize coverage.
Resist the urge to make immediate repairs beyond emergency measures that prevent further damage, like tarping a leak. Permanent fixes before the adjuster’s inspection can eliminate evidence and provide grounds for claim denial. If you must tarp or cover the damage, photograph the area thoroughly first and keep all damaged materials. Your insurer needs to see the original condition to verify the claim and determine appropriate compensation.
Step 2: Professional Inspection and Assessment
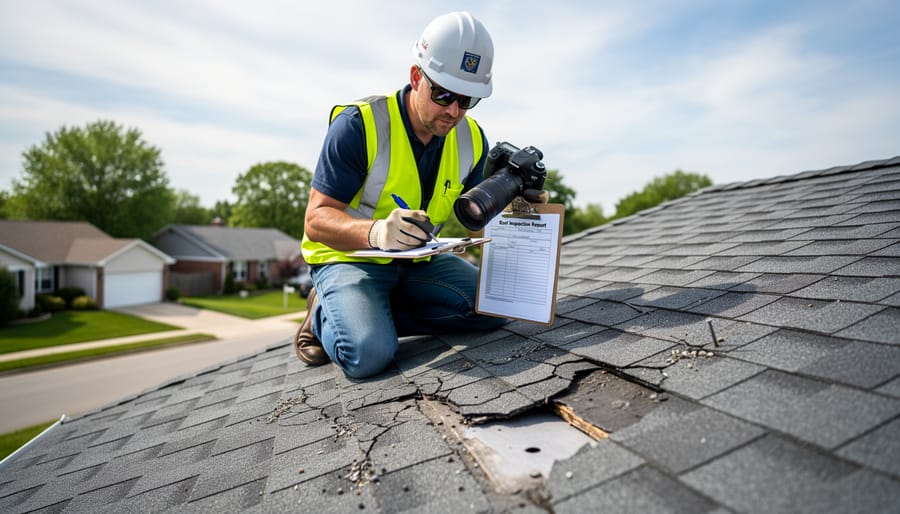
After documenting the initial damage yourself, the next crucial step is arranging professional inspections. You’ll typically need two separate evaluations: one from a qualified roofing contractor and another from your insurance company’s adjuster.
Contact a licensed roofing professional with experience in new construction within 24 to 48 hours of discovering damage. Look for contractors who regularly work with insurance claims, they understand what documentation insurers require and can provide detailed assessments that support your claim. The contractor should inspect not just visible damage but also check for underlying issues like compromised decking, damaged underlayment, or water infiltration that might not be immediately apparent.
Your insurance adjuster will conduct their own inspection, usually within three to five business days of your claim filing. Their role is to verify the damage, determine coverage, and estimate repair costs. Be present during this inspection and ensure your roofing contractor’s findings are available for comparison.
Request written reports from both parties that include photographs, measurements, and specific descriptions of all damage. These dual assessments create a comprehensive record that protects your interests and establishes the scope of necessary repairs, preventing disputes about coverage or costs later in the process.
Step 3: Gathering Supporting Documentation
Gather every piece of paperwork related to your new roof before you provide documentation to adjuster. Start with the construction contract, which shows agreed-upon materials, timeline, and workmanship standards. Collect all material specifications and product data sheets for shingles, underlayment, flashing, and ventilation components, these prove what quality level was promised and installed.
Your building permit and all associated inspection reports are critical. They demonstrate code compliance and establish when construction milestones occurred. If inspectors noted any concerns during framing or installation stages, those reports become important evidence.
Retrieve manufacturer warranties for roofing materials and any workmanship warranties from your contractor. These documents clarify what defects should be covered outside the insurance claim. Include invoices and receipts showing what was actually purchased and installed, along with any change orders that modified the original scope.
Don’t forget progress photos taken during construction. These images show installation methods, substrate condition, and proper sequencing, details that matter when adjusters question whether damage resulted from faulty installation or an external event. Organize everything chronologically in both physical and digital formats for quick reference.
Step 4: Filing the Claim with Your Insurer
Once you’ve gathered your documentation, submit your claim promptly. Most insurance policies require notification within a specific timeframe, typically 48 to 72 hours for storm damage, though new construction policies may have different provisions.
Complete the claim form thoroughly, providing your policy number, construction timeline, and a clear description of the damage. Be precise but factual: “Wind-driven rain penetrated roof decking through improperly sealed underlayment along northwest corner” works better than “the roof is leaking.” Include the date damage occurred, when you discovered it, and whether construction was ongoing or complete.
Attach all supporting documentation: photos, inspection reports, material specifications, builder contracts, and any warranties. Create a detailed inventory of damaged materials and affected areas. If temporary protective measures were necessary, document these costs separately with receipts.
When communicating with adjusters, respond promptly to requests but never feel pressured to make immediate decisions. Keep written records of all conversations, including dates, names, and what was discussed. Ask questions if coverage terms or procedures aren’t clear, understanding the process protects your interests and prevents misunderstandings that could delay your claim.
Step 5: Navigating the Adjuster’s Review
When the adjuster arrives to evaluate your new construction roof, they’ll inspect the documented damage, review your submitted materials, and assess whether the issue falls within policy coverage. Expect detailed questions about the construction timeline, when you first noticed the damage, and whether any repairs have been made. Be honest and stick to the facts, speculation about causes can complicate your claim. The adjuster may take photos, measurements, and notes comparing the damage against your construction documentation.
Most adjusters will provide a preliminary verbal assessment before leaving, though the official determination comes later in writing. Don’t treat this conversation as the final word. If the adjuster suggests the damage isn’t covered or questions your documentation, politely ask them to explain their reasoning and note their response. Request a copy of their inspection report for your records.
Stay present during the entire inspection and don’t hesitate to point out damage the adjuster might miss, especially less obvious issues like compromised underlayment or fastener failures that may not be immediately visible. Having your roofing contractor present can be valuable, they can provide technical explanations and ensure nothing is overlooked during this critical evaluation.
Step 6: Receiving and Reviewing the Settlement Offer
When the insurance company sends their settlement offer, resist the urge to accept it immediately. Request a detailed, line-by-line breakdown of how they calculated the payout, many adjusters provide only a lump sum without itemizing materials, labour, and overhead. Compare this breakdown against your own contractor’s estimate and the documentation you gathered in earlier steps.
Watch for common underpayment tactics: depreciated material costs that don’t reflect actual replacement prices, insufficient labour allowances for new construction complexity, or excluded items the adjuster claims aren’t covered. If the offer seems low, Canadian insurance regulations give you the right to dispute it. Obtain a second opinion from an independent roofing professional who can provide a competing estimate with current pricing.
Before negotiating, organize your evidence: photos, contracts, material invoices, and expert assessments. Present gaps in coverage calmly and factually. If the insurer remains inflexible and you believe they’re acting in bad faith, consider consulting a public adjuster or legal professional who specializes in construction insurance disputes.
Verification and Quality Assurance After Claim Approval
Once your claim is approved and repairs are scheduled, your role shifts to ensuring the work meets all agreed-upon standards. Start by reviewing the settlement agreement and repair scope document from your insurer, this outlines exactly what should be completed, which materials are approved, and any specific requirements the insurance company has mandated.
Before any work begins, confirm that your roofing contractor holds current liability insurance and Workers’ Compensation coverage. Request copies of these certificates and verify they remain valid throughout the repair period. During the repair process, schedule at least one mid-point inspection to confirm the contractor is using the specified materials and following proper installation techniques. Don’t hesitate to ask questions if something appears different from what was outlined in the claim approval.
When the roofing work is complete, arrange for a final inspection with both the contractor and a municipal building inspector. Many jurisdictions require this inspection for new construction or substantial roof replacements to confirm compliance with current building codes. The contractor should provide a completion certificate and activate any manufacturer warranties on materials used, ensure you receive written confirmation of warranty registration with coverage start dates clearly stated.
Document the completed work with dated photographs from multiple angles, capturing both overall roof views and close-ups of critical areas like flashing, valleys, and penetrations. Compare these images against your pre-repair documentation to verify that all damaged areas were addressed. Request a detailed invoice that itemizes materials used, including brand names and model numbers, which provides a permanent record of what’s actually on your roof versus what was initially proposed. This verification process protects your investment and ensures you can confidently close out the claim knowing the work meets insurance requirements, building standards, and the quality expectations for new construction roofing.
Common Challenges and How to Overcome Them
New construction roofing insurance claims often encounter predictable roadblocks that can delay or reduce your settlement. Understanding these challenges ahead of time helps you prepare the documentation and arguments needed to overcome them.
Determining Responsibility Between Builder and Homeowner
One of the most frequent disputes involves pinpointing when responsibility transfers from the builder to you. Insurance companies may argue that damage occurred during construction when the builder’s risk policy should cover it, while builders may claim it happened after occupancy when your homeowner’s insurance applies. This grey area creates finger-pointing that leaves your damaged roof in limbo.
To navigate this, maintain a detailed timeline with dated photos from the construction phase through occupancy. Your possession date, final walkthrough documentation, and certificate of occupancy establish clear transition points. If damage appears shortly after possession, demonstrate through professional assessment that the issue stems from construction defects or work quality rather than subsequent events.
Common Obstacles You’ll Face
Several challenges consistently appear in new construction roofing claims:
- Proving whether damage existed before possession or occurred afterward, especially when defects manifest weeks after closing
- Navigating overlapping coverage between material warranties, workmanship guarantees, and insurance policies
- Separating material defects (potentially covered) from installation errors (often disputed)
- Addressing coverage gaps when builder’s risk expires before homeowner’s policy activates
- Overcoming insurer arguments that construction defects aren’t sudden, accidental events
Material versus labor coverage creates particularly thorny disputes. Insurers may approve replacement materials but deny labor costs, arguing that installation errors constitute gradual deterioration rather than covered damage. Counter this by obtaining expert opinions that link the failure to a specific covered event, not poor workmanship alone.
When your claim stalls, independent professional assessments carry significant weight. A qualified roofing contractor experienced in insurance claims can provide detailed reports that distinguish between covered perils and excluded conditions, often breaking deadlocks that leave homeowners without resolution. Documentation quality frequently determines whether these challenges derail your claim or become minor administrative hurdles.
Working with Roofing Professionals Throughout the Claims Process
Working with a roofing contractor who understands insurance claims can transform a frustrating process into a manageable one. The right professional brings dual expertise: they know how to build or repair roofs correctly, and they speak the language adjusters use when evaluating damage and calculating settlements.
Experienced contractors document damage thoroughly from the start. They photograph defects with proper context, measure affected areas accurately, and identify issues an untrained eye might miss, hidden water damage beneath shingles, compromised decking that needs replacement, or installation errors that violate manufacturer specifications. This documentation becomes critical evidence when adjusters question the scope of necessary repairs.
Communication is where contractor expertise proves invaluable. When adjusters visit the site, knowledgeable contractors explain technical issues in terms insurance companies recognize, connecting visible damage to covered causes and justifying repair methods with building code references. They can counter low settlement offers with detailed estimates that break down material grades, labor requirements, and code-mandated upgrades the adjuster might have overlooked.
Quality assurance continues after claim approval. Professional contractors ensure repairs meet both insurance specifications and actual building standards, sometimes these differ, and experienced roofers know when to push back on inadequate settlement amounts that won’t cover proper repairs. They handle permit applications, coordinate inspections, and provide warranties that protect your investment beyond the insurance settlement.
Choose contractors with verifiable insurance restoration experience. Ask about their adjuster relationships, request examples of past claims they’ve navigated, and confirm they carry liability insurance that protects you during the repair process. The best contractors view themselves as your advocate, not just a service provider executing repairs.
Frequently Asked Questions
Does insurance cover roofing defects in new construction?
Coverage depends on the type of defect and your policy. Builder’s risk insurance typically covers damage from external events like storms or vandalism during construction, but may not cover poor workmanship or material defects, those usually fall under the builder’s warranty. Once you take occupancy, your homeowner’s insurance covers sudden damage but generally excludes construction defects, which remain the builder’s responsibility during the warranty period.
When does builder’s risk insurance end and homeowner’s coverage begin?
Builder’s risk insurance typically ends when construction is substantially complete and you take possession of the property, or when your homeowner’s policy becomes effective, whichever comes first. There’s often a transition period where neither policy clearly applies, so confirm exact dates with both your builder and insurance provider to avoid gaps in coverage.
Can I file a claim before construction is complete?
Yes, you should file immediately if damage occurs during construction. Builder’s risk insurance is designed specifically for this scenario, covering the structure while it’s being built. Notify both the builder and the insurance carrier right away to document the damage before any repairs begin.
What if damage occurs between construction completion and my move-in date?
This gap period is risky because builder’s risk may have expired while your homeowner’s policy hasn’t activated yet. Check with your insurance broker about getting early activation of your homeowner’s policy or extending builder’s risk coverage, and ensure the property isn’t left unoccupied and vulnerable without some form of active coverage.
How long do I have to file a new construction roofing claim?
Most policies require prompt notification, typically within days of discovering damage, even if you haven’t fully assessed the extent. While the formal claim deadline varies by province and insurer, waiting too long can jeopardize your claim, especially if the delay allows further damage or makes it harder to prove when the original damage occurred.
Will filing a claim on new construction roofing affect my future premiums?
It depends on the circumstances. Claims for unavoidable events like hail damage during construction typically have less impact than multiple claims or those involving negligence. Builder’s risk claims usually don’t affect your personal homeowner’s insurance rates since they’re separate policies, but discuss potential implications with your broker before filing.
Understanding these common questions helps you approach new construction roofing insurance with realistic expectations. Many homeowners assume their coverage is more comprehensive than it actually is, or they wait too long to report damage because they’re unsure whether it qualifies for a claim. The distinction between construction defects covered by builder warranties and insurable damage from external events trips up many first-time homebuilders.
Provincial regulations in Canada can also affect your rights and timelines, particularly regarding statutory warranties on new homes that may overlap with insurance coverage. In Ontario, for example, Tarion warranty protection covers certain defects for specific periods, which can complement or complicate insurance claims depending on the situation. Knowing which protection mechanism applies to your specific issue saves time and frustration when problems arise.
If you’re uncertain whether damage warrants a claim or falls under warranty coverage, document everything thoroughly and consult with both your insurance adjuster and a qualified roofing professional who understands the nuances of new construction. Getting expert guidance early prevents costly mistakes and ensures you pursue the right avenue for resolution.
Understanding the insurance claims process for new construction roofing protects your investment and ensures you receive the coverage you deserve when damage or defects occur. The difference between a successful claim and a denied one often comes down to proper documentation, timely action, and professional guidance from the outset.
Canadian Roofs & Co. brings a unique advantage to new construction projects: we understand both the construction process and the insurance claims landscape. Our team documents every phase of your roof installation with the precision insurers require, maintains detailed records of materials and workmanship, and stands behind our work when claims arise. We communicate directly with adjusters, provide expert assessments, and advocate for fair settlements that reflect the true scope of necessary repairs.
The most successful outcomes happen when homeowners partner with experienced professionals before issues arise. By choosing a contractor who anticipates potential insurance scenarios, maintains meticulous records, and knows how to navigate claims effectively, you transform a potentially stressful situation into a manageable process with predictable results.
Don’t wait until damage occurs to think about insurance documentation. Contact Canadian Roofs & Co. today to discuss how our comprehensive approach to new construction roofing protects both your home and your financial interests throughout the entire lifecycle of your roof.