
How to Plan Custom Cabinetry During Your Whole-Home Renovation
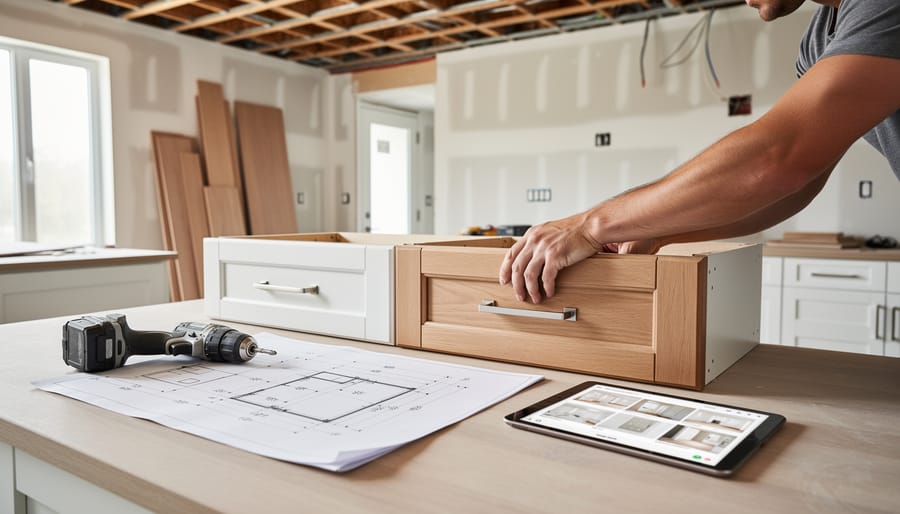
Custom cabinetry planning must begin before demolition starts in a whole-home renovation, typically three to six months ahead of installation, with detailed measurements, finishes, and hardware selections locked in at least 12 weeks before cabinetry delivery. This early timeline prevents the most common renovation bottleneck: discovering during framing or mechanical work that cabinet dimensions conflict with structural elements, plumbing runs, or electrical panels, forcing expensive redesigns or settling for stock solutions that compromise the vision.
The coordination challenge extends beyond simple measurements. Custom cabinetry intersects with nearly every trade on site. HVAC ductwork may need to route around upper cabinets. Electrical rough-in depends on knowing exactly where task lighting, outlets, and appliance connections will land. Plumbing stub-outs must align with sink and dishwasher locations down to the quarter-inch. Even roof lifespan planning factors in when scheduling affects whether exterior wall modifications happen before or after cabinet installation.
Homeowners who treat cabinetry as a late-stage decision often face delays that cascade through the entire project schedule. Framers wait for cabinet specs to build soffits. Drywallers can’t close walls until electrical boxes are positioned. Flooring installers need to know whether cabinets sit on finished floors or subfloor. The result: contractors standing idle, budgets inflating, and move-in dates pushed back months.
This guide provides a phase-by-phase approach synchronized with renovation milestones, from initial space planning through final installation verification, helping homeowners coordinate cabinetry decisions with general contractors, trades, and designers to maintain project momentum and achieve seamless integration. Resources like canadiancustomcabinets.ca offer additional guidance for coordinating custom cabinetry timelines with whole-home renovations.
Why Custom Cabinetry Must Be Planned Before Renovation Work Begins
Custom cabinetry sits at the intersection of nearly every major renovation trade, making it one of the most critical elements to plan upfront. When you delay cabinetry decisions until after structural work begins, you force expensive corrections and create cascading delays across your entire project timeline.
Your cabinetry design dictates where electricians must place outlets, switches, and under-cabinet lighting circuits. A kitchen island requires dedicated electrical runs roughed in before concrete is poured or subfloors installed. Similarly, plumbers need exact sink and appliance locations to position supply lines and drains at precise heights and lateral positions. Changing these specifications after walls close up means cutting into finished drywall, rerouting pipes through framing, and adding thousands in change orders.
Flooring decisions also hinge on cabinetry plans. Will cabinets sit on top of hardwood, or will flooring run underneath? This affects floor height calculations, baseboard details, and whether you need toe-kick adjustments. Getting this sequence wrong creates visible gaps or forces costly floor patching.
The manufacturing timeline compounds these coordination challenges. Custom cabinetry in 2026 typically requires eight to twelve weeks from finalized drawings to delivery, and premium materials or complex designs push this further. Contractors cannot install cabinets that haven’t arrived, which means countertop templating waits, appliance installation stalls, and your kitchen or bathroom remains unusable while other renovation areas sit complete.
Budget impacts multiply when planning happens late. Rush fees for expedited cabinetry production add 15-25 percent to costs. Emergency electrical or plumbing modifications to accommodate last-minute cabinet changes run two to three times standard rates because trades must return to completed areas. Your general contractor may need to carry crews longer than estimated, increasing labour costs across the entire project. Early planning eliminates these predictable but entirely avoidable expenses.
Essential Information and Materials Needed for Cabinetry Planning
Working with Your Renovation Team
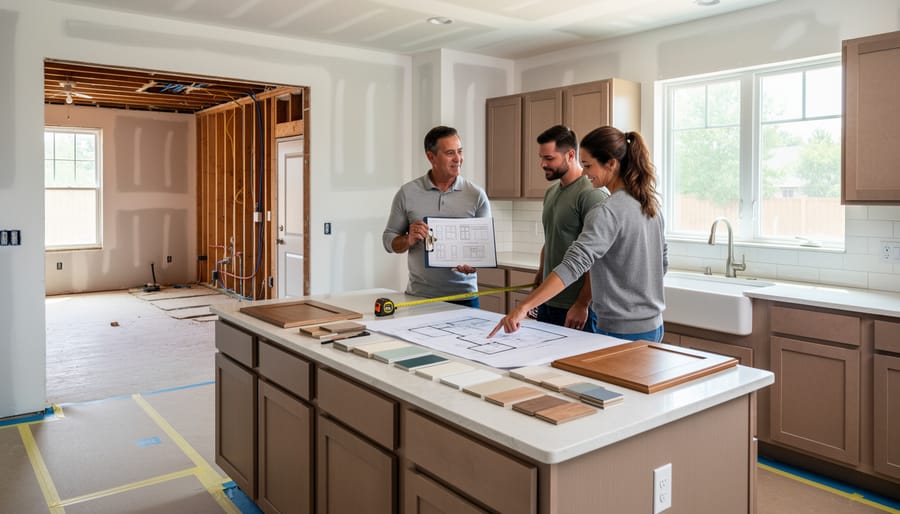
Successful cabinetry integration depends on clear communication among your general contractor, electrician, plumber, and cabinetry designer from day one. Each trade needs access to the cabinetry plans before they begin their work, not after.
Your general contractor should lead coordination meetings where all trades review the cabinetry layout together. This prevents the common problem of electricians placing outlets where upper cabinets will mount, or plumbers running supply lines directly behind drawer boxes. These mistakes force expensive rework and delay installation by weeks.
Establish a single point of contact for cabinetry questions. When your electrician needs to confirm the exact height for under-cabinet lighting outlets, they shouldn’t wait days for an answer while multiple people debate. Designate either your contractor or cabinetry designer as the decision-maker who can provide immediate, authoritative responses.
Request that your contractor schedule a pre-drywall walkthrough with the cabinetry designer present. This site visit catches placement errors while they’re easy to fix. The designer can physically mark wall locations for outlets, verify rough-in positions against the plans, and confirm measurements before walls close up.
Canadian Roofs & Co. manages this coordination as part of comprehensive renovation projects, ensuring all trades work from current cabinetry plans and that communication flows smoothly. We’ve found that projects with dedicated coordination prevent 80% of common installation problems.
Keep all trades working from the same plan version. When cabinetry designs change, immediately distribute updated drawings to everyone.
Critical Safety and Building Code Considerations
Custom cabinetry installation in Canadian homes must comply with the National Building Code of Canada and provincial building regulations, which govern clearances, ventilation, accessibility, and materials. Ignoring these requirements leads to failed inspections, costly retrofits, and potential safety hazards.
Kitchen cabinetry requires minimum clearances around ranges and cooktops: at least 150mm between combustible cabinetry and unprotected cooking surfaces. Wall cabinets above ranges need 760mm minimum clearance, or 450mm if a properly rated range hood is installed. These measurements prevent fire hazards and ensure adequate ventilation space. Bathroom cabinets near showers or tubs must allow proper moisture management and comply with electrical code spacing from water sources.
Ventilation codes mandate that kitchen range hoods exhaust at minimum 150 CFM (cubic feet per minute) for standard residential cooking, with higher ratings for professional-grade equipment. Cabinets housing range hoods must accommodate proper ductwork routing to exterior walls. Understanding these bathroom renovation basics helps homeowners recognize similar code requirements across all cabinetry applications.
Accessibility standards under the Ontario Building Code require consideration for barrier-free design in certain circumstances. D-shaped pulls prove easier to grasp than knobs, lower wall cabinets improve reach, and toe-kick heights affect wheelchair access. While not mandatory in all residential renovations, incorporating accessible features adds long-term value.
Fire-rated materials become necessary when cabinets adjoin or enclose furnace rooms, mechanical spaces, or attached garages. These situations require specific materials and installation methods that your renovation team must identify during planning. Some energy-efficient upgrades also affect cabinetry planning, particularly when insulation improvements change wall depths or when new HVAC systems require modified layouts.
Common code violations include undersized clearances around appliances, improper cabinet mounting that fails to meet load-bearing requirements, and inadequate lighting in work areas. Planning cabinetry with code compliance from the start prevents expensive corrections during final inspections.
Step-by-Step Process for Integrating Cabinetry into Your Renovation Timeline
Phase 1: Pre-Construction Design and Selection
Before any demolition begins, dedicate time to designing your cabinetry in detail. This phase typically starts 10-14 weeks before construction, allowing sufficient time for design iterations and custom fabrication lead times.
Schedule consultations with your cabinetry designer and general contractor together. Walk through each space where cabinets will be installed, kitchens, bathrooms, laundry rooms, mudrooms, home offices. Discuss how you use these spaces daily. Do you need deep drawers for pots? Pull-out shelving for pantry items? Specialized storage for cleaning supplies? Your designer translates lifestyle needs into functional layouts.
Review preliminary renovation plans with your cabinetry designer to identify potential conflicts early. If your electrician plans outlets where upper cabinets will hang, or your plumber’s drain placement conflicts with base cabinet configurations, resolve these issues now rather than during construction.
Select cabinet door styles, wood species or painted finishes, hardware, and internal organization features during this phase. Decide between frameless European-style or face-frame construction. Choose soft-close hinges, pull-out trash systems, divider inserts, and lazy Susans that maximize storage efficiency.
Finalize detailed shop drawings showing exact cabinet dimensions, placement, and specifications. These drawings guide your renovation team’s rough-in work and ensure everyone works from identical plans. Request itemized quotes that break down costs by cabinet type, making budget adjustments easier if needed.
Approve final designs and place your cabinet order before demolition starts, protecting your renovation timeline from manufacturing delays.
Phase 2: Coordinating Rough-Ins During Construction
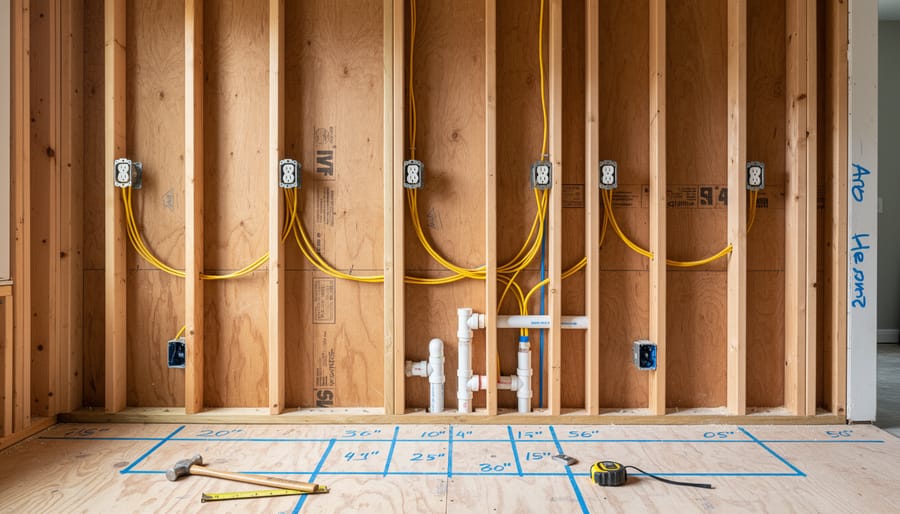
Once your cabinetry plans are finalized, the rough-in phase becomes critical. This is when electricians and plumbers install the infrastructure your cabinets will depend on, and precision matters more than in almost any other renovation stage.
Your electrician needs exact locations for under-cabinet lighting, outlet placements for appliances, and switch positions that won’t be blocked by cabinet doors. In kitchens, outlets must sit where cabinet layouts allow access while meeting code requirements. A cabinet designer’s elevation drawings should specify outlet heights and horizontal positions down to the inch. Share these drawings with your electrician before rough-in begins.
Plumbing rough-ins require equal precision. Supply lines for sinks, dishwashers, and refrigerators must emerge exactly where cabinet bases allow access. A supply line positioned three inches too far left can force costly cabinet modifications or emergency plumbing adjustments after cabinets arrive.
Before drywall goes up, verify every rough-in against your cabinetry plans. Walk through with your contractor, designer, and trades. Measure outlet locations, check plumbing stub-out heights, and confirm lighting positions. This 30-minute verification prevents problems that would cost thousands to fix later.
Insist on photographic documentation of all rough-in locations before walls close. These photos become invaluable references if questions arise during cabinet installation, eliminating guesswork and protecting everyone involved.
Phase 3: Pre-Installation Verification
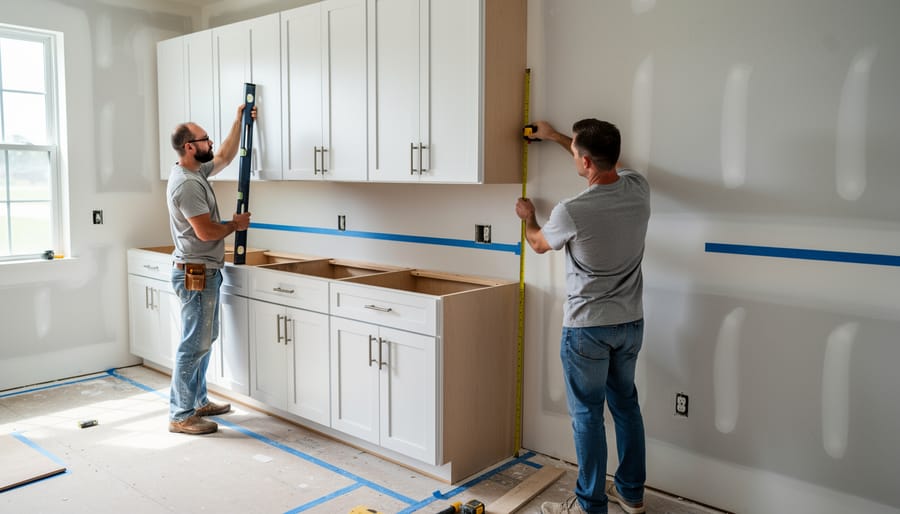
Before your custom cabinets arrive, conduct a thorough verification to catch discrepancies that can derail installation. This critical checkpoint occurs after drywall, flooring, and trim work are complete but before cabinetry delivery.
Measure all wall lengths, ceiling heights, and diagonal distances in each room receiving cabinets. Compare these against the measurements your cabinet designer used. Even small variations, as little as half an inch, can prevent proper installation or create unsightly gaps.
Check that electrical outlets and switches align precisely with your cabinetry plans. Outlets should be positioned where they won’t interfere with cabinet backs or shelving. Verify that plumbing rough-ins for sinks and appliances emerge at the correct heights and distances from walls.
If you discover discrepancies, contact your cabinetry designer immediately. Minor adjustments might require filler strips or trim modifications. Significant changes may necessitate cabinet redesign, which is far less costly than installing cabinets that don’t fit.
When structural surprises during renovation have altered original plans, load-bearing walls that couldn’t be removed, relocated plumbing, or unexpected HVAC ductwork, work with your designer to revise cabinetry layouts before manufacturing begins. Waiting until installation day compounds problems and expenses.
Document all verified measurements with photos and notes for your installation team.
Phase 4: Cabinet Installation and Integration
Cabinet installation begins once all rough-ins are verified and final finishes are complete. Professional installers follow a strict sequence: base cabinets go in first, leveled and secured to wall studs, then wall cabinets are mounted at predetermined heights (typically 18 inches above countertops, 54 inches from the floor). This order allows installers to work without obstructing access or risking damage to already-installed units.
After cabinet boxes are secured, coordination becomes critical. Schedule countertop templating only after base cabinets are installed and level, measurements taken from blueprints rarely match field conditions. Fabricators need three to five days for cutting and finishing; coordinate appliance delivery for the day after countertop installation to prevent scheduling conflicts and protect new surfaces.
Specialty features like pull-out pantries, lazy Susans, and soft-close hardware require adjustment during installation. Installers should verify each door swings freely, drawers glide smoothly without binding, and all mounting hardware is torqued to manufacturer specifications. Canadian Roofs & Co.’s renovation teams conduct this quality control before appliances arrive, when access is easiest.
Final integration involves coordinating finish carpenters for trim work, electricians for under-cabinet lighting connections, and plumbers for sink and dishwasher hookups. Each trade needs sequential access, trim can’t be installed until cabinets are secured, lighting requires cabinet mounting to be complete. Walk through with your contractor at this stage, checking alignment, finish consistency, and hardware operation. Address any deficiencies immediately while the installation crew is still on-site.
Common Renovation-Cabinetry Coordination Challenges and Solutions
Even with meticulous planning, renovation projects frequently encounter challenges that affect cabinetry integration. Recognizing these issues early and having contingency strategies in place helps keep your project on track.
Structural surprises during demolition rank among the most common disruptions. Opening walls may reveal unexpected plumbing lines, electrical conduits, or structural supports that conflict with your cabinetry layout. When this occurs, resist the urge to force the original design. Instead, work with your contractor and cabinetry designer to adjust the layout before fabrication begins. Minor modifications, relocating a pantry cabinet by 150mm or adjusting upper cabinet heights, often resolve conflicts without compromising functionality. Document all changes in writing and update your electrical and plumbing plans accordingly.
Delayed material deliveries can derail installation schedules, particularly when custom finishes or specialty hardware face supply chain issues. Build buffer time into your renovation timeline by ordering cabinetry materials at least 10-12 weeks before the planned installation date. If delays occur, communicate immediately with your contractor to reschedule dependent trades like countertop fabricators and appliance installers. Some homeowners opt for temporary countertops or partial installations to maintain livability during extended delays.
Appliance specification changes create significant coordination problems. A refrigerator 50mm wider than originally specified won’t fit the planned cabinet opening. Lock down appliance models and exact dimensions during the design phase, then verify those specifications haven’t changed before cabinetry fabrication begins. Purchase appliances early when possible, or at minimum, confirm delivery dates align with cabinet installation.
Budget pressures often force mid-project compromises. Rather than eliminating entire cabinetry sections, consider scaling back finishes, switching from solid wood to veneer doors, simplifying hardware selections, or reducing specialty organizational inserts. These adjustments maintain functionality while controlling costs. Avoid deferring structural cabinetry work to “phase two” of your renovation, as this typically costs more long-term and disrupts the completed space.
Verifying Successful Integration and Final Inspection
Your final inspection determines whether the cabinetry installation meets acceptable standards and complies with your contract specifications. Schedule this walkthrough with your cabinetry installer and general contractor present, ideally in natural daylight to identify any finish inconsistencies or alignment issues that artificial lighting might mask.
Start your inspection with a comprehensive checklist covering both structural integrity and functional performance:
- All cabinets are level, plumb, and securely fastened to wall studs or blocking
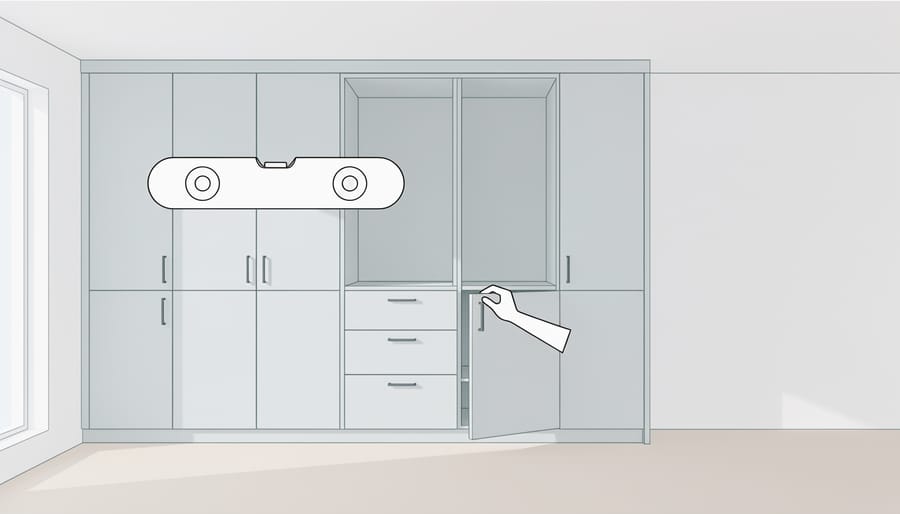
- Doors and drawers open smoothly without binding, scraping, or gaps at closure
- Cabinet faces align properly with consistent reveal spacing between units
- Appliances fit flush as designed with proper clearances for ventilation and operation
- Hardware is straight, tight, and operates correctly without loose screws
- Interior shelves sit level and adjustable pins engage firmly in pre-drilled holes
- Toe kicks are secure with no visible gaps at flooring transitions
- Crown moulding and trim pieces meet cleanly at corners without visible gaps
- Finish quality is consistent with no scratches, dents, or colour variations
- Light rail, if included, is properly attached and conceals under-cabinet lighting fixtures
Test every door, drawer, and mechanical component multiple times. Soft-close mechanisms should engage smoothly about two inches from closure without slamming. Pull-out shelves and organizers must extend fully and retract without resistance.
Document any deficiencies with photographs and written notes during this inspection. Reputable installers address minor adjustments on the spot, tightening hardware, adjusting hinges, filling small gaps. Significant issues like damaged panels, miscut pieces, or non-functional components require written documentation with agreed correction timelines before you authorize final payment.
Request all warranty documentation, care instructions, and touch-up materials during this final meeting. Most quality cabinetry carries a one-year installation warranty covering workmanship defects and a separate manufacturer’s warranty for materials and finishes.
Frequently Asked Questions About Cabinetry Planning During Renovations
When should I finalize cabinetry selections during my whole-home renovation?
Ideally, you should finalize cabinetry designs and place orders before demolition begins or within the first week of construction. This timing accounts for the 8-12 week lead time typical for custom cabinetry in 2026 and ensures your contractor can coordinate rough-ins accurately with your specific cabinet layout.
Can I change my cabinetry design after construction has started?
Minor changes like hardware or finish adjustments are usually possible, but significant layout modifications after electrical and plumbing rough-ins are installed become extremely expensive and time-consuming. If you must make changes, address them immediately and expect potential delays while trades rework their installations.
What happens if my existing cabinetry gets damaged during the renovation?
Document all pre-existing conditions with photos before work begins, and review your insurance for renovations to understand coverage for accidental damage during construction. Your contractor’s liability insurance may cover damage their crew causes, but homeowner policies often exclude wear and tear or damage from work you authorized.
How do I ensure my contractor and cabinetry designer are properly coordinated?
Establish a communication protocol at the project start where your cabinetry designer provides detailed shop drawings to your general contractor, electrician, and plumber. Schedule a pre-rough-in meeting where all trades review the cabinet plans together, and require your contractor to verify measurements before ordering begins.
Cost management during cabinetry integration requires setting a realistic budget that includes a 10-15 percent contingency for unforeseen structural issues. Custom cabinetry represents a significant investment, typically accounting for 15-20 percent of a whole-home renovation budget, so understanding what drives costs helps prevent surprises. Material choices, construction methods, finish complexity, and organizational features all impact final pricing, and your designer should provide itemized quotes that break down these components clearly.
Working with experienced renovation professionals who understand the interdependencies between trades makes the entire process smoother. Canadian Roofs & Co. coordinates cabinetry planning as part of comprehensive renovation management, ensuring designers receive accurate structural information and that installation occurs at precisely the right phase of your project. This integrated approach prevents the costly miscommunications and timing errors that plague renovations where homeowners try to manage multiple contractors independently.
Successfully planning custom cabinetry during a whole-home renovation comes down to treating it as an integral part of the project from day one, not an afterthought. When you coordinate cabinetry design with structural changes, electrical work, plumbing installations, and finish selections, you avoid costly delays, prevent installation problems, and ensure your final result functions beautifully for years to come.
At Canadian Roofs & Co., we understand that comprehensive renovation projects require seamless coordination across all trades and design elements. Our experience managing multi-phase renovations has shown us that homeowners who invest time in thorough cabinetry planning early in the process consistently achieve better outcomes, both in functionality and in overall renovation value boost when the project is complete.
Don’t navigate this complex process alone. Working with renovation professionals who understand the critical connections between cabinetry and other construction phases ensures your custom storage solutions integrate flawlessly into your transformed home. The right team will coordinate the timeline, manage the trades, and deliver the quality craftsmanship your investment deserves.